Have you ever seen apple cider in the grocery store and thought about how delicious cider is, if only they wouldn’t add so much sugar and corn syrup? Or maybe you have been at an apple orchard and wanted to buy a gallon of fresh cider only to be shocked by how expensive it is. Well, cider is now yours to make thanks to the handy Instant Pot®! By making your own cider, you will be spending significantly less and be able to control what goes into your delicious beverage. Add a little less sugar if you’d like or amp up the cinnamon. No matter what small changes you make, you are going to be in love with this homemade cider. Perfect for fall, perfect for a cold winter day, perfect for any holiday you may be celebrating, this cider is just…perfect!
Hot Deals

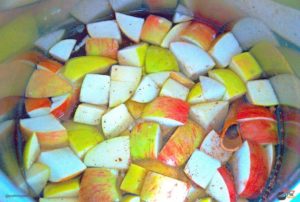
Instant Pot® Apple Cider
Equipment
- Instant Pot
- Measuring Cup
- Measuring Spoon
- 1 small bowl
- Strainer
- Ladle
- 1 large bowl
- Chef’s Knife
- Cutting Board
- Rubber Spatula
Ingredients
- 3 Apples
- 3 Cups Water
- 2 Cinnamon Sticks
- 0.5 tsp Ground Ginger
- 0.25 tsp Ground Nutmeg
- 0.5 tsp Vanilla extract
- 0.25 cup Brown Sugar`
Instructions
- Remove the core from the apple and chop into cubes. No need to peel the apples! Just core and chop

- Add the cinnamon sticks, ginger, nutmeg, vanilla and brown sugar to the pot and toss together with the apples

- Pour the water over the apples and place the lid on the Instant pot, close and make sure the steamer valve is set to “seal”. Press the “manual” button and set the timer for 15 minutes cooking time at high pressure. When the time is up, let the Instant Pot® naturally release the pressure inside. This means, just let it sit on your counter for another 15 minutes or so until you are able to unseal the lid (the Instant Pot® releases the lid lock when the pressure is fully released).
- Pour the contents of the apple cider into a strainer over a large bowl. If you want your cider to be completely clear, just strain the fruit and discard, leaving behind a beautiful cider. If you would like a cider that is a little thicker, press some of the apples through the mesh strainer using the back of a ladle and mix with the juice.

- Serve the cider hot or cold and store in the fridge for up to two weeks!

So did you like the cider hot or are you more of a cold cider person? Do you have any questions before making this super simple recipe? Let us know in the comments below! We will answer any questions you may have while we sip on our homemade cider…